
- Best joystick, throttle, yoke for MS Flight Sim
- The best VR headsets for MS Flight Sim
- PC hardware guide for MS Flight Sim
With that out of the way, lets get cracking on those settings.
1. In-game Graphic Settings
| Graphical Setting | Recommendation (for a Nvidia 4090) | Comments |
| Render Scaling | 100% | This adjusts the resolution at which the game is rendered. 100% is native. Reduce this to 80% if you are having performance issues |
| Anti-Aliasing | TAA | This remove jaggies. TAA is Temporal AA and its a medium tier AA tech. |
| Terrain LoD | 150% | The Level of Detail of the Terrain. Higher is better but it eats up performance. |
| Terrain Vector Data | Low | Affects tessellation for edges of certain terrain features. |
| Buildings | High | Minor performance impact unless you are close to the ground |
| Trees | High | Medium performance impact but only closer to ground. |
| Grass And Bushes | High | Same as above. |
| Objects LoD | 150% | This is the Level of Detail of objects in the game. I am happy with 100% but if you have some headroom left you can go a bit higher. Medium performance impact. |
| Volumetric Clouds | High | This can have some performance impact but its not as bad as I expected based on other sims. |
| Texture Resolution | High | Performance intensive but important for a good visual experience |
| Anistrophic Filtering | 16x | This has minimal performance impact so crank it up to 16x. It makes some things look better. |
| Texture Supersampling | 4×4 | Some performance impact. Definitely go over this. |
| Texture Synthesis | High | High should be fine. If affects how the scenery looks at a distance and you want it to look nice. |
| Water Waves | High | Makes the water look good. Minor performance impact. |
| Shadow Maps | 768 | Affects shadow quality. Performance intensive. |
| Terrain Shadows | 512 | Shadows are important. This usually has a high performance impact but 512 seems ok. I go much higher in other sims like DCS. |
| Contact Shadows | Off | Nice to have but performance heavy. Not worth it. |
| Windshield Effects | High | Minor performance impact. Does what it says. |
| Ambient Occlusion | Off | High performance impart even on 2D monitors. Best to leave it off. Maybe in 5 years! |
| Reflections | High | Reflections are performance heavy but really add to the visual experience. |
| Light Shafts | Off | I personally dislike all these fake camera effects in my games (even 2D). Turn them off unless you really like it. The performance impact is minimal. |
| Bloom | Off | Same as above. |
| Depth of Field | Off | Same as above. |
| Lens Correction | Off | Same as above. |
| Lens Flare | Off | Same as above. |
| Glass Cockpit Refresh Rate | Low | Some performance impact. Affects how quickly the reflections update on the cockpit glass. |
1.1 Traffic Settings
A lot of people ignore traffic settings but it is very important you spend some time here. Every car, every horse, every boat, every other plane in the game has a performance cost and you need to minimize it. Personally, I reduce it as much as possible since I find it unnecessary. However, I know some people like the hustle and bustle of AI vehicles zooming around. In any case, make sure the use generic models settings is turned on as this will reduce the load along with low traffic variety. For individual density, pick a value form 0 to 50% depending on how much you really need (I usually go all the way to zero).
2. OpenXR (most important)
OpenXR is a superior API and runtime implementation compared to OpenVR and SteamVR. I highly recommend you use it if your headset supports it. Luckily, most headsets do support it.
Step 1: Go to the official Microsoft Store and download “OpenXR Developer Tools”. Once you run it for the first time, you should see it ask you to choose OpenXR as the runtime. If you dont see this, its probably already your preferred runtime as you can also select it using SteamVR:
Step 2: Once you do this, SteamVR wont be used at all for MS Flight Simulator even if you own the game on Steam. Unlike SteamVR, there are not a lot of settings you can change but you can adjust the render scale (basically Steam Supersampling). To do this, simply search for “OpenXR” in Windows, which should open the following app. 100% is the default resolution. I usually set it around 150% with a 4090 but this is a very heavy setting. I recommend you keep it at 100% unless you have a 4090 or are planning to use re-projection.

Step 3 (optional but highly recommneded): Download OpenXR toolkit from here. This nifty little tool can be used for showing fps in the game, using FSR, foveated rending and other tricks to improve performance, turning on motion re-projection, and even adjusting colours etc. For starters, just use it to turn on motion-re-projection.
3. NVIDIA Control Panel Settings
Assuming you have an Nvidia graphics card, there are a few settings you can tweak here. Or rather that other guides tell you to tweak without knowing what they even mean.
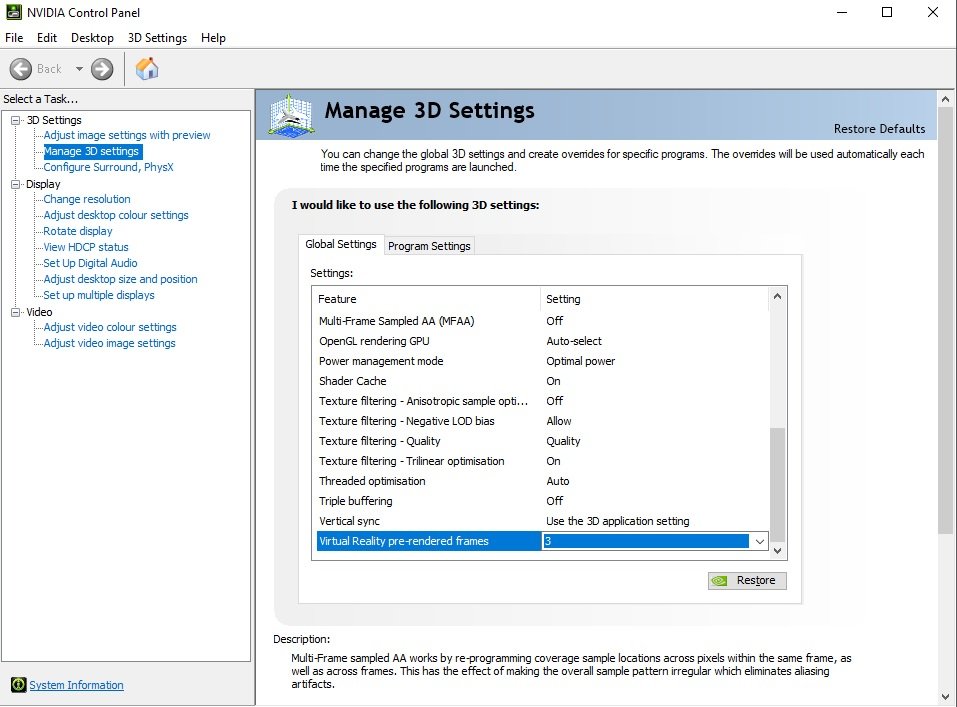
Virtual Reality pre-rendered frames – The one setting that often gets talked about is “Virtual Reality pre-rendered frames” and setting that to 3. Note that there is a trade off here between frames and latency with this setting. Increasing it to 3 means the CPU will buffer some additional frames ready but it may cause higher latency/ lag/ input delay and even mess up re-projection. So don’t just blindly put it to 3 and call it a day – it might make things worse. Try 1 or 3 and see which one your brain prefers.
Anti-aliasing – Some guides also tell you to set anti-aliasing to 2x MSAA from here instead from the in-game setting as it is faster. That is also not true. You can’t set MSAA at the driver level for DirectX11 games. You can switch MFAA on from here though and that does work.
4. Windows Settings
Windows Game Mode – Off unless you have a AMD 7950X3D
Xbox game bar – Doesn’t really matter but you do need it if you have a 7950X3D
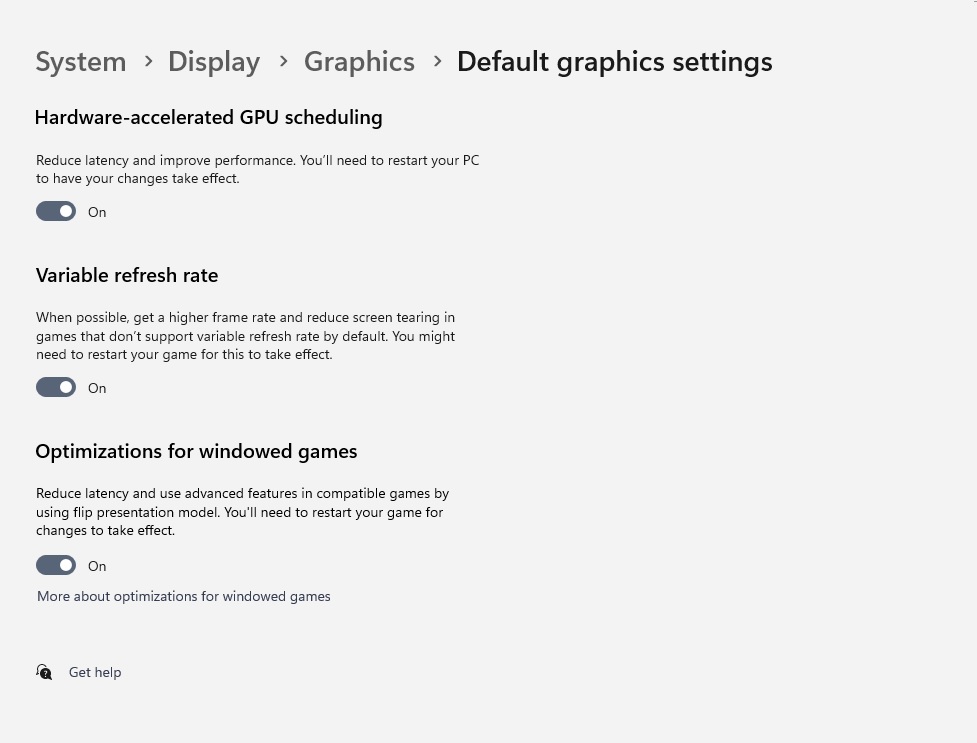
Hardware Accelerated GPU Scheduling (HAGS) – I used to turn it off but its got better these days.
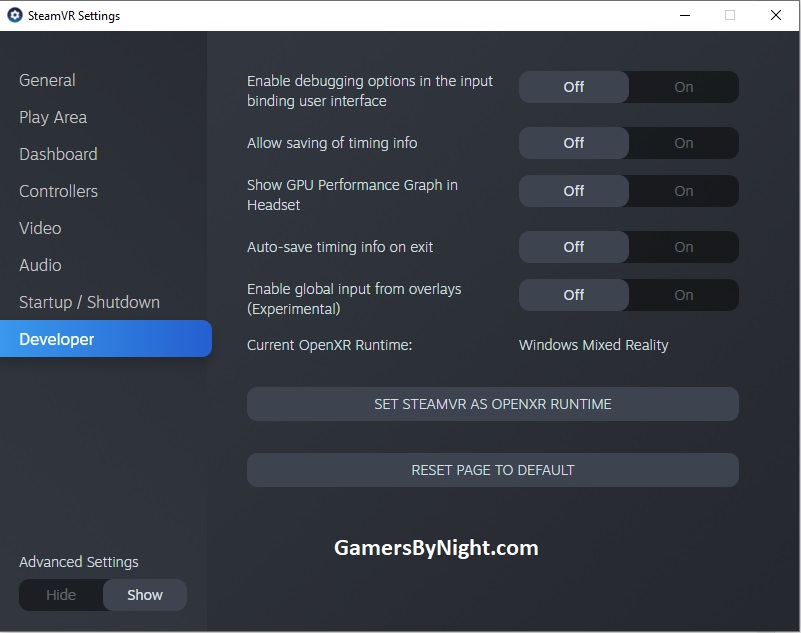
4. SteamVR Settings (not recommended anymore)
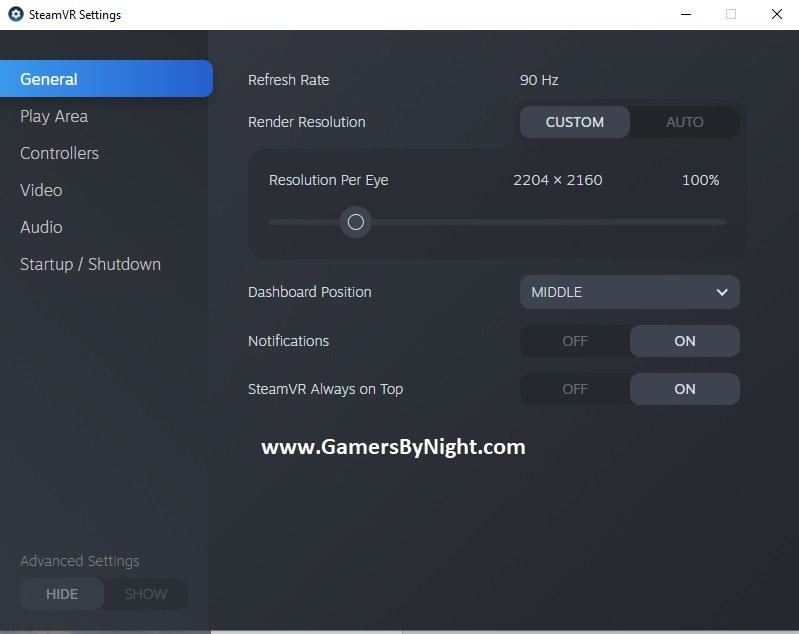
Motion Smoothing – Your headset will most likely have a refresh rate of 90Hz, 80Hz or 120Hz etc. Sometimes your GPU will not be able to keep up. So what happens is that SteamVR, Oculus or WMR will look at the previous few frames and use predictive algorithms to extrapolate or guess the next frame. This means that if the GPU can’t keep up with the refresh rate, you will see some guesstimated frames.
Motion Smoothing is Valve’s name for this tech. I think it is best to keep this on even if you hit 90 FPS normally. It does have some downsides, but it is better than not having it on. If you ever do go below 90 FPS (which you will), it will prevent frame drops.
Note that WMR’s motion reprojection is also turned on by this same setting for now. Read the next section on WMR to know more.
Resolution – This is where you set your super sampling level. You have two choices here. Push it up and then aim for 45 FPS with reprojection/ motion smoothing to make up for the rest. Keep it low and aim for 90 FPS or whatever is the native FPS for your headset.
I generally use 150% SS for other games but its simply not possible with MSFS so I have to use 100%. You wont get anywhere close to 90 FPS even with a 3090 in MSFS. Just tinker with it based on your graphics card and VR headset.